I Found A Cheaper Way to Get the Peloton Experience
My Story
Here is my story on how I did Peloton-like workouts for less than $100.
The COVID lockdown was indeed a break, staying at home for more than 3 months took a toll on me. As a fresh graduate intern in fortune insurance, I was always active throughout the day, this helped me keep fit, though I've always loved cycling which I do regularly on weekends.
The lockdown interrupted all these, I had to stay indoors, spent all day curled before the TV or laptop with a bowl of popcorn, sometimes pizza, and coke. I'm sure you can guess where this led me to Weight gain.
I wasn't too cool with this, one reason being that my best friend's wedding was in 2 months and I was her chief bride's maid, just like every other lady, I wanted to look my best to honor my friends special day, besides, old friends from high school and college would be coming around, I didn't want to be called "fat", I had to lose weight fast.
I had just 8 weeks to lose as much as I can, my weekend cycling couldn't cut this, I needed to do more.
Peloton Craze
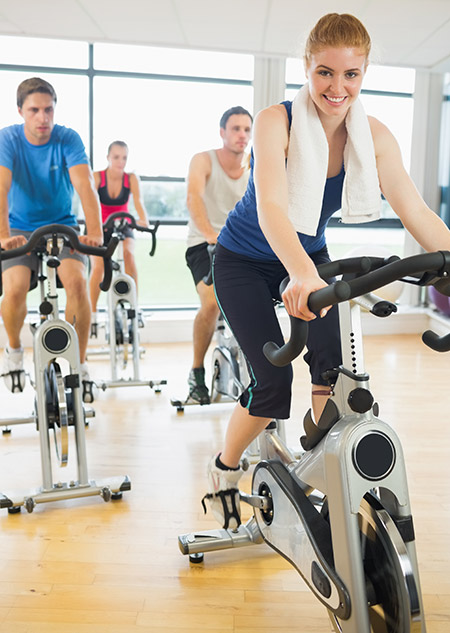
This prompted me to do tons of research, then I came across Peloton and it intrigued me. Peloton is a company that seeks to create the live experience of studio cycling in homes, with its sleek well-built bike, large range of well-produced classes to choose from starring experienced instructors. Like WW (Weight Watchers), Peloton creates an engaging community workout for anyone, anywhere at any time.
Studies have shown that indoor cycling may improve aerobic capacity, blood pressure, fat loss and body composition. (1)
Such is the Peloton craze that it is turning the cycling Industry upside down. I read about people who were able to lose as much as 5-8 pounds daily by taking high-intensity interval cycling training classes (more on HIIT Training) consistently on the Peloton.
This was exactly what I wanted, because of its convenience, flexibility, organization and assurance that it works.
Peloton Expensive
Though I really wanted this, I couldn't afford a Peloton bike because it is crazily expensive. There are two models; the Peloton Bike and Peloton Bike+ which cost $1,895 and $ 2,495 respectively. Then there are the accessories such as mat, shoes, water bottles, which I'll have to buy separately or order. It attracts extra costs of $100 to $300 respectively depending on the accessories you want.
Besides this, I'll need to subscribe monthly to enjoy the full Peloton experience, otherwise, the bike will be like every other stationary bike without any special function. The monthly membership subscription costs about $39, which amounts to $ 468 yearly. Altogether, this amounts to over $2000 the first year, just for the basic plan and is much higher than my budget will allow.
Knowing that this is beyond what I could afford, I decided to study how Peloton works and try to replicate it in the cheapest way possible and guess what, I managed to do this successfully. I was able to achieve what I wanted to with the Peloton-like setup and to loose 45 pounds within 8 weeks.
You might think, how on Earth is this possible? First, I'll take you briefly through how Peloton works and why it is so successful, then I'll show you how I replicated the Peloton experience with less than $100.
How Peloton works
Peloton replicated a life gym in homes, through it's;
Classes and Tutors
The convenience of home-based work out is not unique to the Peloton. However, Peloton has distinguished itself through the unlimited streaming access it offers to various workouts.
For indoor cycling, Peloton has over 14 live classes daily which you can pick from, and over 10,000 on-demand classes in any of 12 class types from low impacts, to intervals, climbs, etc.
You can choose your workout based on timing; from 5 minutes warm-up or cool down to 30 mins, 45 mins, and even 90 mins in length, Peloton has something for everyone.
You can also choose your class based on music genre (classic, country, hip-hop) or instructor.
Peloton also has several poised and engaging instructors who motivate you every step of the way, to confront your boundaries and perform better than you ever thought you can.
Metrics Monitoring
The Peloton bike provides you with performance tracking metrics, which aid motivation. During a ride, the lower part of the Peloton tablet displays all sorts of stats; current speed, time elapsed, distance covered, resistance intensity, cadence, and calories burnt.
You'll also see your power output at every moment during the work-out. This is used to determine your place on the leaderboard.
Competition
Have you imagined a world without competition (whether against yourself or your peers), it'll be a world where everyone is relaxed, where no one set goals and even those who have them set are not motivated to achieve them.

Competition helps contribute to building the persistence and determination we need to achieve our goal.
During a ride, besides your metrics which appears on the lower side of the iPad, you'll also have a leaderboard that shows everyone engaging in a live class or the total number of people who has been involved in an on-demand class and your rank based on your power output.
As you cycle, you can see yourself rise or drop on the leaderboard based on your performance.
"In my first live class, I decided I was going to finish in top 200 of about 500 and I had to pedal like mad to make this happen," says Amy one of Peloton users.
Peloton unlocks the competitive spirit in you, keeping you focused on the ride, pushing you further to become more immersed in the class.
You can also filter your leaderboard to see only your record and how you've faired over time, this is also a very good source of encouragement and can help you track how close you are to your set goal.
Community
One of the key selling points of Peloton is the sense of virtual community it builds. Peloton brings together different people from different social statuses and communities, united by a single goal of fitness.
For many Peloton users, a big reason why they stay through to it daily is the friendly competition, connection, motivation from fellow riders. The fact that you can see other riders in live classes and browse through their profiles.
You can also see friends in competition, take shared rides, participate in Peloton challenges and compare your progress with that of friends and family members.
Peloton also maximizes social platforms like Facebook, Reddit, Fitbit, etc. You can connect to your friends on Facebook, join tribes on Reddit, read and watch a variety of content on Peloton-owned channels that are instructional, motivational, and entertaining. You can also always ask questions and be sure to get a prompt, precise response.
This is the Peloton craze, it's more than just the bike or tablet attached to it, it's about a community of people motivating you daily to achieve your fitness goal, and providing for you how to measure your closeness to it on each ride, using your stats.
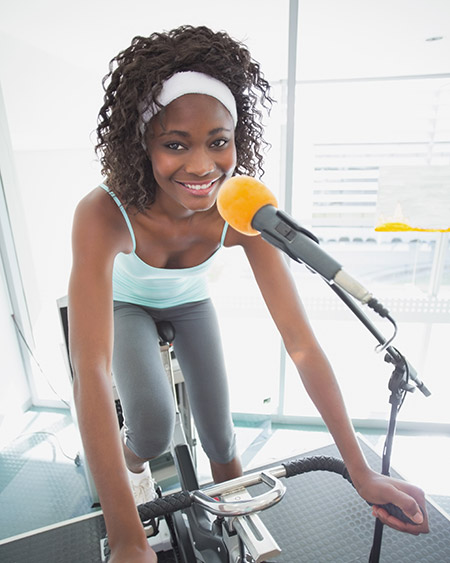
DIY Peloton Bike Hack Less Than $100
Thinking through how I could replicate the Peloton experience, I needed to get a spin bike and a tablet. Since most spin bikes cost about $350 upward, I decided to order a bicycle trainer stand with 8 levels of resistance (BalanceFrom Bike Trainer) for less than $100, connected it to my road bike there it was, my spin bike.
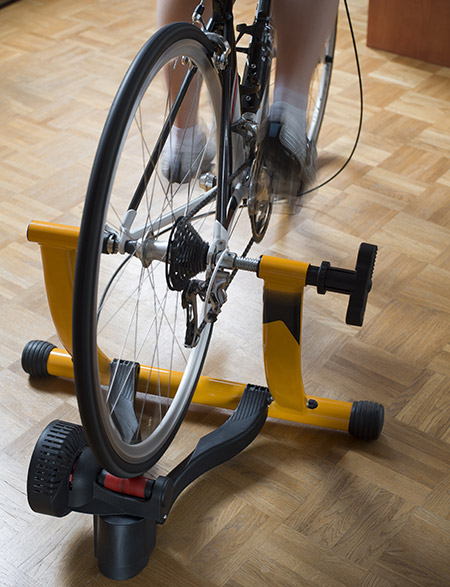
Then I moved the TV in my sister's old room to the basement. With this, I had a spin bike and monitor. You might think it was a bit cheaper for me because I already had a road bike, yeah it was however, if you don't have one can't afford a new spin bike, you can check up used spin bike on Kijiji or Facebook market place, sometimes you can get bikes that are being sold out by commercial gym as low as $ 100-300.
A Guide And Metrics Tracking
With this I had a spin bike and a screen, I needed a guide, so I surfed through YouTube for videos and found a 25 mins Global cycling network high-intensity interval training cycling video.
I knew this video was it for me. I decided to go for this because it was less than an hour, fits into my busy schedule, the instructor was clear, motivating, and a bit humorous. This made the ride fun, I loved the music, and most importantly I love the fact that get to track the Intensity of my work out by following the video and using the Rate of Perceived Exertion.
The RPE gave me an idea of my metrics without using any tool. By metrics I mean heart rate and average power exerted.
Tracking stats using the Rate of Perceived Exertion
The rate of perceived exertion is a scale (chart) that is used to gauge the intensity of your workout. It ranges from 1-10 and involves you asking yourself, on the scale of 1-10, how hard is this activity.
The scale has different values for describing how you feel at every point of your workout. Some tables match values of RPE with the range of heart rate and power exerted at any time. So when you know your RPE, you can have an idea of your HR and power exerted.
A Community of Cyclers
I spoke with some of my colleagues, my best friend who was about to wed, and 3 other friends about this, we decided to create a mini cycling community, created a WhatsApp group, where we can easily check up on ourselves, compare our stats and keep each other honest.
We decided to cycle 5 times weekly, 2 days together virtually (weekends mainly) with everyone tuned in at a particular time we chose, following the class on YouTube, and connected via a WhatsApp call and sometimes Zoom.
The remaining of the week where we can't do it at same time, we all report our starting and finishing time on the group chat. We also do conference calls in the evening where we discuss several things including our workout for the day.
Peloton-like Work Out Video
Let's talk extensively about the Global Cycling Network Video.
THE PELOTON EXPERIENCE It is a 25 mins workout video with a great instructor who'll encourage you to put in your best effort with great humor and music combo.
The video will take you through 3 pedaling positions that is divided into intervals. This will help maximize effectiveness with the workout, keep fatigue at bay and burn off more fat.
POSITIONS As mentioned above, there are a total of 3 positions
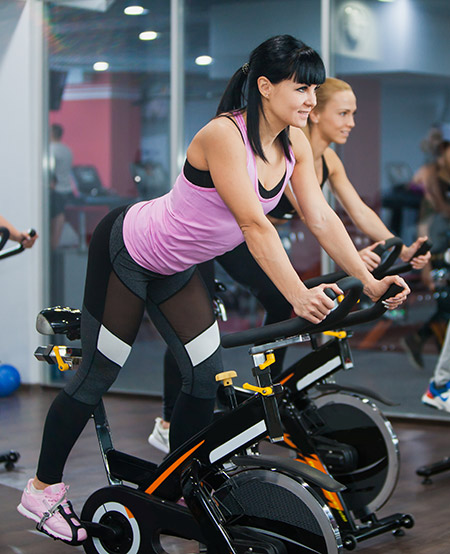
Position 1: Sit on the saddle, place your hand on the handlebars, slightly bent such that you can lay a stick across them push down on the pedal, and up to complete the cycle. This position is the most comfortable of the three, although almost all major muscle groups used for cycling are exercised but to a lesser intensity as compared to the others. It requires lesser 02, prevents you from getting fatigued easily.
Position 2: Stand out of the saddle, imagine a string is pulling your head out to the ceiling, place your fingertips on the handlebars, engage your core to keep you upright.
In this position more power is produced, all muscle groups are exercised in higher intensity, especially the core muscles, requiring more energy and oxygen, more calories are burnt, Heart rate also increases as the heart tries to pump at a faster rate to supply oxygen to vital tissues as more oxygen. Therefore one easily gets fatigued
Position 3: Stand out of the saddle, place your hands at the end of the handlebars, and stick your butt towards the back.
WARM-UP It is for a total of 3 minutes, start in effort level 1, alternate between the 3 positions for 2mins 30 Sec. The single green bar at the side denotes effort level one, it is described as easy spinning, the RPE (rate of perceived exertion) is less than 2, meaning it feels like a light activity, you can maintain for hours, of which you can easily breathe and even converse.
The average heart rate here is less than 68% of your Maximal Heart Rate (MHR), Average power less than 55% FTP (ie 55% of your functional threshold power).
During the last 30 sec, change position from 3 to 1, and increase your effort to level 3, hence the 2 green and 1 orange bar. Effort Level 3 is called Tempo, throughout the workout, this the level you'll return to after the effort phases for the easy ones.
A this level, you're not working so hard but effort level is above the comfort level, you're breathing faster, require concentration. The RPE is about 3-5, Heart rate is about 84-94% MHR and average power of 76-90% FTP
INTERVALS There are a total of 6 intervals, with effort and easy phasis in the ratio of 1:1.
Interval 1 (15 sec phases, Five times) It lasts for a total of 2 mins 20 sec, within this time, you'll alternate between 15-sec effort and 15 sec easy for a total of 5 times. Effort phases should be done at effort level 6 and easy at level 3 ( also known as tempo). Effort level 6 denotes intense activity which requires maximal effort, hence the 3 red bars on top of the 2 green and 1 orange bar.
It is called the anaerobic phase and is designed to increase anaerobic activity, average power is greater than 121% FTP, because of this much intensity, effort is usually non-steady, therefore heart rate isn't much of a useful guide in this.
Take another 30 sec for recovery in tempo zone before moving to the next interval
Interval 2 (30 sec intervals, 3 times) Here, you'll alternate between 30 secs of effort and 30 sec easy. The effort phases are at level 5 and easy remains at level at 3 as always (tempo).
Effort level 5 is also called VO2 Max because it aims to improve VO2 Max. You'll need all the encouragement you need at this phase because you'll feel so much leg fatigue but you have should keep going. Your Heart rate at this point is over 106% MHR and average power between 106 and 120% RPM.
You'll start this interval at position 3, then change to position 1 after 1min 30 sec, to complete the remaining 1 mins 30 sec in position 1.
Take about 30 more sec to recover, peddle in the tempo zone.
Interval 3 (45-sec intervals, 4 times) This is for a total of 6 mins, in which you'll alternate between 45 sec of effort and 45 tempo (easy), for a total of 3 times. The effort intervals should be done at level 4 which is somewhat strong, just above the tempo level. The Heart rate is usually between 95 and 105% MHR and the power about 92-105% RPM.
Observe the change in position from 1 to 2, 1 and 3
Interval 4 (45 sec intervals, 2 times) Start in position 3, maintain this throughout this interval which will last for a total of 3 mins, add more resistance, alternate between 45 mins of effort and 45 Sec tempo. The effort intervals are at level 4 (note it's just four bars with 1 red) and tempo at level 3.
Interval 5 (30 sec intervals, 3 times) This is similar to intervals 2, the only difference is the change in position from position 3 to 2 and back to 1. Use 20 sec for recovery
Interval 6 (15 sec intervals, 5 times) This is also similar to interval 1, the difference also is the change in position, do all in position 1 except the last interval in position 3.
This is the last interval after which, you'll cool down and stretch.
COOLING DOWN This part is also very important, it gives your blood vessels and heart the chance to ease out of the exercise session, gradually into a pre-exercise state.
Note: as you keep paddling, whenever you notice it's getting too easy and feel like you not feeling control, you can increase the resistance.
Last Words
Just like me, you can DIY your budget version of the Peloton, that's just as good. As long as you ensure you follow the principle Peloton uses; an excellent tutor, tracking your metrics, harnessing the benefits of community and competition, you'll get the same result.
I did my version of Peloton for as low as $100, saving over $1900, and still got my desired result.
Don't give yourself the excuse of you not having enough to shop for a Peloton bike or pay for a subscription to deter you from achieving your fitness goal.